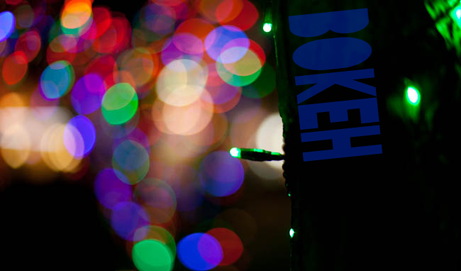
Bokeh (boh-kay) is the way that the way the lens renders out-of-focus points of light. You might hear people describe it as “those light spots” or “those blurry lights”. You can read all sorts of neat stuff about bokeh here, here, and here if your technically inclined. What I’m going to talk to you about today is how to get super cool bokeh!

You can do this very easily if you have an SLR or another camera with which you can use manual focus. This post assumes you have a SLR, but if you know who to switch your other camera into manual focus (not manual exposure), exactly the same techniques will work for you! Most SLR lenses have a little switch on them that you can toggle from AF (auto focus) to MF (manual focus). When you are learning how to shoot bokeh, I highly recommend you use MF.
One more thing to note about bokeh, your lens will matter. The more circular your aperture, the prettier your bokeh will look. The awesome entry level 50mm F1.8 lens produced by both Canon and Nikon will result in an octogonal bokeh – part of what makes those lenses such a good value is that they use fewer blades. That said, you can still get a similar effect, for a very very good price!
If you want your bokeh to be a circle (or almost), you’ll need a lens with more blades (and these are generally much more expensive). I took all of the images in this post with the Canon 50mm F1.4 lens, which, you can see, is almost circular. This lens retails for about 4x as much at the 1.8. If I upgraded to the 1.2, which would result in an almost perfect circle, it would be another 4x as much!
The key to bokeh is that the more out of focus your points of light are, the bigger your bokeh will be. In the following three images, you see the bottom left image is in focus and the points of light are teensy tiny, the bottom left image is a bit out of focus, and the top image is quite out of focus. I took these images with my camera in manual focus and I just snapped three shots as I changed the focus.

The next three images are of the Toronto skyline as seen from the rooftop patio on my building. I did exactly the same thing as in the image above. Notice in the top left image that I almost took it too far (whether or not you agree with me will depend on your own personal aesthetic!) The points-of-light are huge in that image!

Once you’ve mastered bokeh on its own, it gets fun to put people in your images. People you love. Like the hubs.

In that image, you can see the hubs is in focus and the lights in the skyscraper behind him are out of focus. Making a really neat winter portrait!
There is also another really neat technique you can use to create shaped bokeh. Read more about that here!
very cool post! love the pictures
Thanks Shey! I love the colours from the Christmas lights at this time of year!
Love this time of year with all the awesome twinkle lights (and thus bokeh opportunities!). I think white twinkle lights should me mandatory year round! :)